Showing posts with label Tips And Tricks. Show all posts
Showing posts with label Tips And Tricks. Show all posts
Saturday, July 7, 2012

This Is The Awesomest Software here
In today's time,
not even every home has a laptop or computer, but every member of
family also own separate laptops or any other device with internet
connection. And everyone want to use internet, prefect if you have a
Wi-Fi at home, but what if you have an Ethernet?
For the
same purpose, I remember the time when we bought a Ethernet switch to
that every laptop connects using a cord, which solved the problem of
connection laptops and computer. Luckily, my windows phone also connects
to internet just by using a data cable plugged to a system with
internet.
But now when I have a iPad, i wanted an another solution as it does not have Ethernet port, through data cable also, it does not connect to Internet. So i was searching on web for some hardwares or softwares to get Wi-Fi hotspot in my home, and found a very awesome, easy and free way to do so, using the softwares Connectify. Thanks to connectify, Now I dont get bore anymore while cooking ;)
But now when I have a iPad, i wanted an another solution as it does not have Ethernet port, through data cable also, it does not connect to Internet. So i was searching on web for some hardwares or softwares to get Wi-Fi hotspot in my home, and found a very awesome, easy and free way to do so, using the softwares Connectify. Thanks to connectify, Now I dont get bore anymore while cooking ;)
Connectify:

Connectify
is a software, that transform your laptop into a Wi-Fi- Hotespot and
enables to share your internet for other laptops, smartphones, PDAs,
Ipods, tablet-pcs, Ipads, gameboids and every wifi enabled devices
through wifi. The best thing is, it require No router or external
hardware for this purpose.But, it do works on Windows 7 only.
How to use connectify:
1. Download connectify I am Providing you Connectify Pro 3.5 for Free
==========
Download from LetitBit
or
Download from TurboBit
=========================== and install it on your windows 7 system.
2. Run connectify, fill Hotspot Name, password, Internet connection and then click on Start Hotspot. Now Wi-Fi hotspot is ready, you can connect other devices with it.
3. Now from other devices search for wi-Fi, it will show your newly created Wi-Fi's name, you can connect to it as usual you connect to any other Wi-Fi network.
4. You can also check the name and list of devices connected and disconnected recetly to your Wi-Fi hotspot from the client tab in connectify.
 |
| Awesome Isn't It |
Must Must Share It Guyz ...!! itz awesome
Saturday, July 7, 2012 0
Tuesday, May 22, 2012
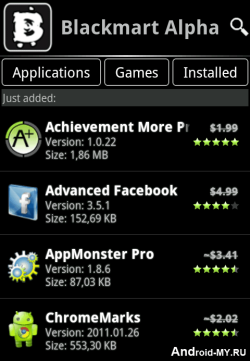 Black Market is another similar application to Applanet
which we posted earlier and allow you to download thousands of Android
Applications and Games right to your device that too for free. It’s a
simple .apk app which you can transfer to your device and than install
it in a normal way.
Its officially not known as Black Market but
its called BlackMart Alpha, it’s a new version which is the improved one
and brings many bug fixes. You can Download BlackMart Alpha Android app and than transfer that file to your android device.
After
installation Fire-Up the app and your will interface like on the right
hand side image, juts browse entire collection of wonderful apps and
games which can be downloaded easily.
Well the another way of downloading Android Apps for free is using 4Shared
which you can also check out. Well hope that you like this applications
and would love to download many many apps. If you find this post useful
than make sure to share it with all your friends.
Tuesday, May 22, 2012 0
Todays generation lives life wirelessly, everything has gone
wire-less so you usually browse internet in your home sitting in your
one room and your modem in another room. Well this gives you a little
enjoyment but also decreases some speeds as there are some bonds like
walls and doors which can make your speeds slow. So we have some small
points or steps which you can follow to make your wireless network much
more faster and stable.

- Positioning your Wireless Router is a must easy and important step for faster internet browsing, make sure your router is poisoned in the middle of your work area, so whenever you are anywhere working you will get a stable speeds.
- Make sure your router is not placed with any walls or metal objects like cabinets or anything as that can reduce your maximum router output.
- Replacing your routers antenna with any powerful one can surely give you a boost, well that’s not always recommended but still if you have some technical knowledge you should surely play with it
- Sometimes there can be problem with your PC network adapter, replace it to see some boost in your speeds.
- Adding Wireless Repeater can increase the range of your router, as it will create some more access points, so one is out of range another one is ready to be used.
- Changing Wireless Channel can also be the next alternate if above points are not coming in work.
- Try reducing wireless interference for more efficient and stable connection, make sure the wireless path is clean and hard object free.
- Update your Routers Firmware for more security and productive options, many new updates are released by the routers manufactures check it out from the routers setting menu and update it right now.
- Try using only one brand for all routers accessories and assets, if you are using a repeater check out if the same routers company has that for you or not.
- If none of the options above work than you need to change the crappy router, many brands bring brilliant routers every month so check it out and start a purchasing adventure.
So
these were few easy tips and tweaks for improving your wireless
network, well hopefully these will surely fix your router speeds. If you
still have any other tweaks which you wanna share please comment below.
WhatsApp
is popular free messaging client which is available for iOS, Android,
Nokia and Blackberry, but still we have no client for Windows PC
officially released by the WhatsApp team. Well you can imagine having
WhatsApp on your PC and how fast you will be able to send and receive
text messages as you always be on one device so you can handle
everything right there. So we found an unofficial client which is
supposed to be a dummy version of Android running on your PC.
BlueStacks App Player Android Emulator :
BlueStacks
App Player helps you install WhatsApp and thousands other application
because its an Android operating system running on your Windows PC. Now
obviously its not like you will get that same kind of experience you can
do with a touch phone and Android installed on it but still if you are a
WhatsApp fan than I must that this software is must for you because
WhatsApp experience on this one is simply unbelievable faster texting
and media exchanging.

Steps to Install WhatsApp on BlueStacks App Player :
So
if you are interested in using WhatsApp right on your PC that you can
grab some installation knowledge from below and start experiencing right
now.
1. Download BlueStacks App Player for Windows PC.
2.
After you have downloaded the above software, start installing it and
it will start downloading its package from the internet, it will take
some time so sit back and have a cup of coffee.
3.
So after downloading it will install and now you will see their user
interface, now you have to sign up for your new account or if you
already have their account than you can login.

4.
Now just search for the WhatsApp like in the above image or find it
from the popular downloads hovering right above in the Rocket Dock,
after you find it click on it and it will start downloading the app.
5.
After WhatsApp is installed click on it and you will see a Terms and
Conditions page where you have to click on Agree and than you will be on
their main phone verification page.

6. Now just select your country and than insert your mobile number and than click on OK.

7.
Now it will start the process of sending you the verification message
on your mobile, if that thing fails you also have an option to call your
number for the verification message. So now just insert that code and
click on OK boom you have successfully activated your WhatsApp messenger
on your Windows PC.

8.
So now WhatsApp is ready for some action, select your already created
groups, if you were having one on your mobile or you can start sending
text or media messages to your friends and create another new group, so I
was just messing around my group Wild Hogs, and tried sending some
messages and delivery was amazingly fast and responsive.
So now
enjoy WhatsApp on your Windows PC with this amazing BlueStacks App
Player, well you can also download and install other amazing Android
Application which you can search and than download, hope you liked this
lengthy tutorial, please share it with all your friends.
Tuesday, April 24, 2012
It is no longer an effective way to get your website indexed by search engine
submission. It would be better if you could get a link from a friendly website that
shares the same topic.
However, for most newbie webmasters, it is not easy to get more backlinks quickly.
Since your website is new and has not been indexed, most webmasters will not want
to link to your website!
submission. It would be better if you could get a link from a friendly website that
shares the same topic.
However, for most newbie webmasters, it is not easy to get more backlinks quickly.
Since your website is new and has not been indexed, most webmasters will not want
to link to your website!
So I Just Brought Something Very Helpful For Your Site or Blog And Will Help You To generate traffic and Backlinks For Free ..
Submit Your Website in my new Site http://www.mywebsitehere.blogspot.com
For Fast listning Use This Code In the End Of Your Site's Description -- IamMitul
So If You Write IamMitul Code In description I will submit your site instantly there ..
You Can Also Tell You Friends about the code .
This Code Is Valid Upto 15 May
So Dont Wait Submit your site/blog now !
Thanks !
Tuesday, April 24, 2012 2
Saturday, April 14, 2012
Are You Getting Troubles In Downloding Stuff From IamMitul Or Any Other Website Don't worry I Got Something Very Helpful for You [Must Read][Very Important Post] | IamMitul
Friends I got Something Very Special and Important Post For You !!
What is Shimory?
Yet another premium link generator.- Free of charge!
Seriously, except if you considered donation as paying. - No installation required!
You can use it anywhere, even in office. - Anonymous downloads!
We act as a proxy for you! - Unlimited Download!
Generate link and unlimited download whenever you want! - Generate link really fast! (depending on the file hosting website)
Once, we generated a link in 2 seconds.
How to use?
- Put your link into the textbox above (depending on the file hosting website that we supported).
- Click the request button or you can just hit enter on your keyboard.
- After some time, a download link will appear.
- Click the generated link to begin download.
What else should I know?
- Shimory is not perfect but we will try our best to defeat errors (if we got free time)
- Shimory's webmaster is a human and not a robot (we have a life too)
- If you ever encountered any on which you will probably encountered many times
please report them to any place where you can reach us, facebook, twitter?, preferably our own forum. - Since we are not a robot, please be patient and wait until we have time to fix the errors.
- Hope you will understand us.
- Enjoy and have fun!
Link To Shimory - http://www.shimory.com
So Guyz Spread This Amazing Website by sharing this Post !! Enjoy !
Saturday, April 14, 2012 0
Thursday, April 12, 2012
Their are variety of Computer games,which you can find all over the
world.Some of the games support high graphics to run and some of the
games can even run on computers without
graphic cards.Did you ever found any game,which runs slow ? If yes!
then here is something,which will help you to increase the speed of your
Games.Just follow the below tips and we will make slow Games Faster.

- Always close other running programs before playing games. Because if you will left the other programs running while playing the game,then they can use your computers memory and processor which will result in Slow Gaming Speed.
- Important reason for Slow Computers are due to the Low RAM.So, upgrade your Computers RAM.To play most of the hardware-intensive games,it is recommended to use 1GB-2GB of RAM
- Adjust the Games inbuilt setting.For example anti-aliasing and Higher screen resolution can result into slow gaming experience.Adjusting these settings will help you!.

- The next tip is to upgrade your processor,which will result in the increase of your computer speed and finally to the speed of the Game.
- Last but not least,Upgrade your default Graphic Card,if the memory and quality of Graphic Card will be good then you can get good gaming experience.
Thursday, April 12, 2012 0
Simple Steps to Follow :
Step 1 – First Go to The Facebook Application Wall Machine and Click on Connect.

Step 2 – Now you can edit Name,Status,Comments,Like and Pictures as you want.

Step 3 – Click on the Name To Edit Name and Click on Status For Editing Status.
Step 4 – For Adding Picture Click on Left Side of the Name.
Step 5 – Click on Like and Rename it and For Editing Comments click on it and Edit the Comments.
Done ! Now Your Fake Status will Be Created .

Step 6 – Now Save your Status By Using Save Button .
Enjoy
Tuesday, April 10, 2012
Facebook Rainbow Chat Code Generator...
Step 3 . Click On Change Button
Tuesday, April 10, 2012 0

Today I have an amazing trick. With this you can check the mobile balance of your Friends in Airtel, Docomo, Idea and Bsnl .
What To Do:
1. Just Dial below Given Number for Checking you Friends Balance :
Airtel – 09810198101
Docomo – 09040012345 or 07737012345
Idea – 09824012345
Bsnl – 9415100123 (only for up) .
2. After Dialing Just Select language
3. After That Already Operator user
4. Now At Last Step Enter Your Friends Number.
One Important thing if Airtel ask for Pin then use 1234 as Pin Number.
Note: Docomo Number is Toll Free but in other numbers Charges are apply as Std Call Rates .
Wednesday, April 4, 2012
If you have ever dreamed to see how exactly White House looks from inside, and what are the real assets kept inside the worlds most powerful person than now you check and clarify all your doubts with the help of Google as they have created a live project that’s that was focused at creating a live experience for all of you who wanted to watch White House from inside.

So now this is done using the earlier street view which you have seen on Google Maps, so they have covered all the areas of the White House using this technology and hence giving you a chance for personal inspection, well so why not jump right into this adventure and see The White House right on your screen sitting on your couch so you can check the direct link below which points to the The White House on Google Maps so have fun and enjoy this amazing tour
Visit White House From Here
Wednesday, April 4, 2012 0

Do you Know:
The UNDP estimates that India loses $2 billion a year because of the
emigration of computer experts to the U.S.[66] Indian
students going abroad for their higher studies costs India a foreign
exchange outflow of $10 billion annually ..
emigration of computer experts to the U.S.[66] Indian
students going abroad for their higher studies costs India a foreign
exchange outflow of $10 billion annually ..

Yesterday I heard That Facebook Took AStudent Doing Software
Engineering in Allahabad, India who received a letter on March 27
from
Facebook confirming his appointment They Want Him For
“security reasons”
and the annual pay package was
$262,500 (around Rs 1.34 crore).
I know Its A good pay but they took a bright future student from India ..
We Should Take a Step To Stop Brain Drain And Develop Our Nation To
The Height Of Success..
The Height Of Success..
I am made a cause on causes.com
you can also be the member of this cause .. and spread
this cause and Post To People Do As Much As You Can..
I hope you wont disagree for this ..
this cause and Post To People Do As Much As You Can..
I hope you wont disagree for this ..

Thanks ,
Your Friend
Mitul.
Sunday, April 1, 2012
 |
| Apple Logo |
Creating Apple ID is Mess to Indian Users, Because Most of Indian People Doesn't have a Credit Card.
To Create a Apple ID and password Credit Card is Must.
But
Don't Worry you Can create Apple ID without Credit Card , it doesn't
need any Hack or Complicated Steps and its not against the Apple Law.
To Create a Apple ID Follow the steps
You Can Create Apple ID on Iphone,Ipad,Ipod Touch and Pc But i strongly recommend you to Create from IPhone.
1. Goto App Store on your Device
2. Select a Free application from the Store
3. Tap Free and then Install
4. Select Create New Apple ID from the dialogue box
5. Select Country as United States (its Important) tape Done
6. Tap Agree
7. Enter your email address,security question,birthday,and password
8. Select None as your Payment Option
9. Then fill all the fields, tap Next
10. tap Done and Check your Email to verify the link
[via Apple.com]
1. Goto App Store on your Device
2. Select a Free application from the Store
3. Tap Free and then Install
4. Select Create New Apple ID from the dialogue box
5. Select Country as United States (its Important) tape Done
6. Tap Agree
7. Enter your email address,security question,birthday,and password
8. Select None as your Payment Option
9. Then fill all the fields, tap Next
10. tap Done and Check your Email to verify the link
[via Apple.com]
Enjoy and Share This Awesome Post :)
Sunday, April 1, 2012 0
Saturday, March 31, 2012
CREDIT: MASHABLE
1. Make Desktop Icons Disappear
This prank is so easy, you can do it in just a few seconds.
When you have access to your victim's computer, right-click on the desktop background, hit the first option -- "View" -- then uncheck the "Show desktop icons" option.
Now, sit back and wait for utter confuzzlement.
When you have access to your victim's computer, right-click on the desktop background, hit the first option -- "View" -- then uncheck the "Show desktop icons" option.
Now, sit back and wait for utter confuzzlement.

2. Enable High Contrast Mode
Enable
"High Contrast Mode" (a display option which inverts some colors to
make the screen easier to read) with a quick shortcut key sequence.
Simply press Shift, the left Alt and the "PrtScr" keys to enable.
After the hilarity has played out, you can revert to a normal display with the same key sequence.
Simply press Shift, the left Alt and the "PrtScr" keys to enable.
After the hilarity has played out, you can revert to a normal display with the same key sequence.

3. Change the Screen's Orientation
This
is an oldie but a goodie. Go to the Control Panel and on the top-right,
where it says "View by," select small or large icons (this is easier to
navigate than the default "Categories" view) and select "Display."
From the choices on the left, select "Change display settings," then use the "Orientation" drop-down menu to pick "Landscape (flipped)."
The most amusing part of the prank is watching your poor victim try to change it back.
From the choices on the left, select "Change display settings," then use the "Orientation" drop-down menu to pick "Landscape (flipped)."
The most amusing part of the prank is watching your poor victim try to change it back.

4. Change the Mouse Pointer
Changing the mouse's pointer icon is a subtle, but effective trick.
Head to the Control Panel, click on "Mouse," then hit the "Pointers" tab.
You now have the option to change how the pointer displays. In our experience, the "Busy" icon is particularly effective.
Head to the Control Panel, click on "Mouse," then hit the "Pointers" tab.
You now have the option to change how the pointer displays. In our experience, the "Busy" icon is particularly effective.

5. Adjust Power-Saving Settings
Another
subtle prank, change a PC's power-saving settings to perplex your
victim as her machine mysteriously changes its usual behavior.
The most effective way to adjust these settings is to make the machine go into sleep mode after a minute.
Go to "Power Options" in the Control Panel, select "Change when the computer sleeps," then set all the options to "1 minute."
Your victim will be forever waking her machine, as it hibernates at the slightest lapse in action.
The most effective way to adjust these settings is to make the machine go into sleep mode after a minute.
Go to "Power Options" in the Control Panel, select "Change when the computer sleeps," then set all the options to "1 minute."
Your victim will be forever waking her machine, as it hibernates at the slightest lapse in action.

6. Change the Default Sounds
Changing a PC's default sounds requires a few minute's access to the Control Panel, but the effect will be worth it.
In "Control Panel" select "Sound," then the "Sounds" tab.
Now in the "Program Events" menu, assign an unusual sound to as many common events as you can in the time available to you. Error, logoff and fail sounds are especially effective.
Be sure to turn the system's sound up to 11, then watch in amusement as your victim's computer emits some unusual audio.
In "Control Panel" select "Sound," then the "Sounds" tab.
Now in the "Program Events" menu, assign an unusual sound to as many common events as you can in the time available to you. Error, logoff and fail sounds are especially effective.
Be sure to turn the system's sound up to 11, then watch in amusement as your victim's computer emits some unusual audio.

7. Add Text to the Clock Display
We're
getting into tricks that require a little more time now, but this is a
great one to carry out if you can ensure your victim will be absent from
his machine for awhile.
Add a small amount of text to your victim's time and date display, which, when they notice it, should freak them out good and proper.
To do this head to the Control Panel. Open "Region and Language." In the "Formats" tab, hit "Additional settings." Select the "Time" tab. In the "AM symbol" and "PM symbol" boxes, enter the text you want displayed. In the "Long time" box type "tt" (with no quotation marks). Hit "OK."
Your text will now show above the date display (where the time used to show).
Depending on how observant your victim is, it might take them awhile to notice the change, but we bet they'll be rather surprised when they do!
Add a small amount of text to your victim's time and date display, which, when they notice it, should freak them out good and proper.
To do this head to the Control Panel. Open "Region and Language." In the "Formats" tab, hit "Additional settings." Select the "Time" tab. In the "AM symbol" and "PM symbol" boxes, enter the text you want displayed. In the "Long time" box type "tt" (with no quotation marks). Hit "OK."
Your text will now show above the date display (where the time used to show).
Depending on how observant your victim is, it might take them awhile to notice the change, but we bet they'll be rather surprised when they do!

8. Schedule a Program to Launch Every Five Minutes
Finally, this trick is the most advanced and takes the longest to set up, but it really has the power to annoy.
From the Control Panel go to "Administrative Tools." Double-click on "Task Scheduler," click on the "Action" menu and select "Create task."
Give your task a name (it doesn't matter what) then click on the "Triggers" tab, click "New," look down to find "Advanced settings," and check the box where it says "Repeat task every..." Click on the drop-down menu and select "5 minutes." Now hit "OK."
Now go to the "Actions" tab and select "New." The drop-down menu should default to "Start a program." Leave it on this option and browse for the program you want to start -- something fairly innocuous like Solitaire is a good bet. Hit "OK." Click on "OK" in the next window and your task will be saved.
The program you selected will now launch every five minutes, driving your victim crazy -- until you chose to reveal your dastardly actions!
From the Control Panel go to "Administrative Tools." Double-click on "Task Scheduler," click on the "Action" menu and select "Create task."
Give your task a name (it doesn't matter what) then click on the "Triggers" tab, click "New," look down to find "Advanced settings," and check the box where it says "Repeat task every..." Click on the drop-down menu and select "5 minutes." Now hit "OK."
Now go to the "Actions" tab and select "New." The drop-down menu should default to "Start a program." Leave it on this option and browse for the program you want to start -- something fairly innocuous like Solitaire is a good bet. Hit "OK." Click on "OK" in the next window and your task will be saved.
The program you selected will now launch every five minutes, driving your victim crazy -- until you chose to reveal your dastardly actions!

These classic suggestions will utterly confuse your hapless victims. Some devilishly simple pranks will only take a matter of seconds to pull off, whereas more advanced trickery will require a couple of minutes to access your victims’ PC control panels.
Must Share this awsome post :)
CREDIT:MASHABLE
Saturday, March 31, 2012 0
Thursday, March 29, 2012
Steps to cut or trim mp3 and create ringtone online.
Step 1. Choose a specific part of a song from beginning to end so that it would start and end clearly, without any unnecessary sounds.
Step 2. Visit http://mp3cut.net/cut_mp3
Step 3. Upload the mp3 song and select interval.
Step 4. Cut and download.

if you find any issues while cutting or trimming the mp3 song. Just Leave Your Comment :)
Thursday, March 29, 2012 1
First You have To learn a Bit is What is hal.dll ?
The hal.dll file has the implementation of the Windows ‘Hardware Abstraction Layer (HAL)’. HAL is loaded in the kernel address and serves the purpose of implementing Operating System in the hardware mode. Though drivers have their files in the .sys files but hal.dll file has some of the kernel related driver’s file. As .dll stands for Dynamic link Library and HAL is implemented in the hal.dll file so generally it can’t be called by any application.Sometimes when starting Windows we encounter the problem:
“Windows could not start because the following file is missing or corrupt:
\system32\hal.dll.
Please re-install a copy of the above file.”

As this is a severe problem so we have deal with it with lots of care.
Causes:
There are several causes of this problem.- The hal.dll file might be damaged or missing from the computer hard drive.
- The boot.ini file can be damaged and this is leading to the problem.
- The Windows is not installed in the path specified in the boot.ini file.
- If we are using multiple Operating Systems in the same machine then it can cause damage to the boot.ini file.
- The Ntoskrnl.exe file is missing or damaged.
- Last but not the least our hard drive may be damaged.
Problems:
The one and only big problem is that our Windows can’t be started due to this problem.Solutions:
As the reasons are many for this problem so there are many ways to fix it.- Simply just restart the Windows; it can be restored right away.
- Check the boot priority in the BIOS settings. It might be directed to other location instead of primary hard drive. If so then we have change the boot priority to the hard drive.
- If this doesn’t fix the problem then we have to repair the boot.ini file. To do so we have to go through some steps:
- Insert the Windows XP CD-ROM into the CD drive and start the computer.
- Now we will see a message in the screen to repair the Window, so we have to press R button.
- Now select Windows Installation type and enter the administrator password when prompted.
- Type bootcfg /rebuild and press ENTER.
- Now we will see the following instruction:
Add installation to boot list? (Yes/No/All)
[Type Y for this]
[Type Y for this]
[Type Windows XP Professional or Windows XP Home Edition.]
Enter OS Load options:
[Leave it blank, and press ENTER].
After this we have to restart our computer and the boot.ini file problem can be fixed.
- If still the problem persists then we have to repair the hal.dll file. For this we have to insert the Windows XP CD-ROM in the CD drive and restart the computer. For repair we have to press R button and on the command prompt we have to type:
expand :\i386\hal.dl_ :\windows\system32\hal.dll
In the we have to put the cd drive path and in the path we have to put the hd drive path.
- If the problem is still there then we have to repair the Windows. For this we have to insert the Windows XP CD-ROM in the CD drive and restart the computer. For repair we have to press ENTER button first and then press F8 to accept the license. Now we have to press R for repairing existing Windows copy. Then following some easy steps we will be able to repair the Windows installation.
- If repair doesn’t fix the problem then we have to reinstall a fresh copy of Windows.
- If the problem is still there then the hard disk may be damaged. We will have to check the hard disk.
Windows root System32 hal.dll Download
You can also download the file from Here and replace your existing corrupted or missing hal.dll file. But you will need to follow the solution steps properly cause in case your hal.dll is missing you system will not boot up properly. So you need another operating system or run your system in DOS mode to do the file copy operation in the right location.If you have any confusion you can drop your comment below ! Thanks :)
Deploying iTunes from an external hard drive, rather than your computer’s internal hard drive has it’s fair share of pros and cons. It’s usually done for space and storage purposes, but there may be some other reasons to migrate your iTunes library to an external hard drive also.

I recently made the jump from a standard hard drive to a solid state drive for my notebook computer, but because SSDs are still quite expensive per gigabyte, I purchased a less expensive, lower capacity SSD. The SSD works great, but there is simply not nearly enough storage capacity to hold the media files such as music, videos, and TV shows that are in my iTunes library. Thus, they needed to be stored on an external drive.
There is one major disadvantage of this approach, which is simply that you of course must have your external hard drive with you, if you want to play songs, watch movies, or watch TV shows in your iTunes library.
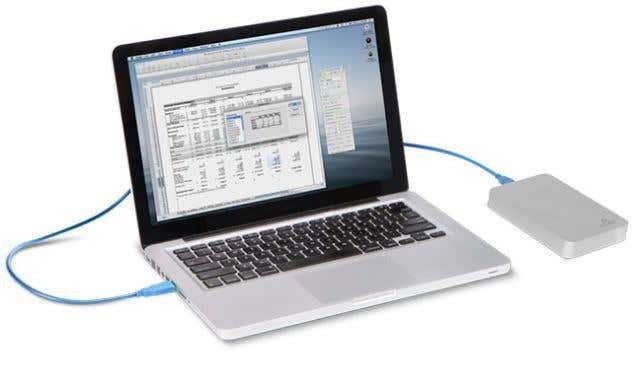
Even so, I actually found that storing iTunes on an external had some pros also. Most people tend to use desktop, outlet powered 3.5” external hard drives to store their media, but I chose a portable, 2.5” USB powered drive for the following reasons:
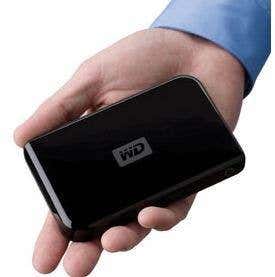
- Being USB powered and more portable, I can take my iTunes library with me while on the go, should I decide to bring my notebook computer also.
- The drive is portable, so I can also easily take it out to the living room and use it with the USB port on the TV, Xbox, Roku, Apple TV, or similar devices.
- With iTunes on an external instead of internal inside of the notebook, it can be easily connected to the back of a router, should I ever want to set it up as an iTunes server.
Copy the iTunes Library
If your iTunes Library is already on your external hard drive, you can skip this step and proceed to Setup iTunes.
With your external hard drive connected to your computer, the first step is to copy the iTunes library from your computer to the external.
In Mac OS X, the path to an iTunes Library is:
Finder > Music > iTunes
In Windows, the path to an iTunes Library is:
Start > Computer > Music > iTunes
Once you have found the top level folder, simply labeled as iTunes, copy it to your external hard drive by dragging the entire folder to the drive. The copying process, of course, may take a considerable amount of time depending on how many files you have in your iTunes Library.
Setup iTunes
Once the copy process has finished, now it’s simply a matter of pointing iTunes towards the new library.
On a Mac:
Launch iTunes and navigate iTunes > Preferences. Select the Advanced tab and click the Change… button. Set the new iTunes path.
On a PC:
Launch iTunes and navigate Edit > Preferences. Select the Advanced tab and click the Change… button. Set the new iTunes path.
Note: The path that you set should be to your iTunes Media folder, which is located inside of the top level iTunes folder.
Assure that the options Keep iTunes Media folder organized and Copy files to iTunes Media folder when adding to library are checked. Click the OK button.
Set Consolidate Files Option
On a Mac:
File > Library > Organize Library…
On a PC:
File > Library Organize Library
Check consolidate files and click the OK button to proceed.
Finishing Up
At this point, you have your iTunes library on the external hard drive, and iTunes is now setup to run media from the external. However, there may be no files showing up in iTunes.
On a Mac:
File > Add to Library…
On a PC:
File > Add File to Library…
Locate your iTunes XML file which is usually labeled as iTunes Library.xml and add it to the library. It is located in the top level iTunes folder in one of the sub folders.
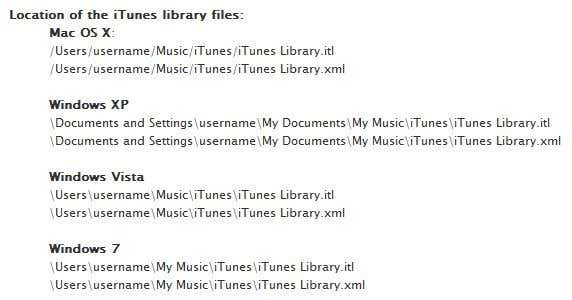
Once added, iTunes should immediately begin to process the file. Once it finishes, your iTunes Library should be populated with your media from the external!
No XML File
If you cannot find the XML file, or if you don’t have an XML file, you can use a different method. Locate the iTunes folder on your external hard drive. From there, locate the iTunes Media folder and open it. Inside, there will be different folders representing the various media types that iTunes handles, such as Music, TV shows, Movies, etc…
Drag each of these folders from the external hard drive into the main portion of the iTunes window on your computer. This should populate iTunes and update the library, but not add the files to your library again. Or in simpler terms, do the same thing as the XML file.
That’s pretty much all there is to it. In using the above tutorial, you should now be running iTunes directly from your computer’s hard drive, but storing the media on an external.
If anyone has any questions regarding setting up iTunes on an external drive, you can leave a comment and IamMitul will try to help out.
Sunday, March 25, 2012
Sunday, March 25, 2012 2
Friday, March 23, 2012
Apple brings a new app called Find My Iphone which could be used to track your device. Don't go with it's name. This app can be used for tracking any IOS device or MAc device that is registed to the Icloud.
You just have to follow some steps to Register your device.
- Go to Settings.
- Touch the iCloud icon along the left hand column.
- Touch Account and sign into iCloud.
- Make sure that the Find My iPad switch is set to the ON position.

Now that you are logged in to iCloud and have the switch turned ON- the fun begins. On your Mac or PC, go to the iCloud website – www.icloud.com – and log into your iCloud account. You will see the iCloud icons on the screen – click on Find my iPhone.

Now after that what you will see in the Next screen will be the all devices and the discoverable devices are having small green dot in front of its name but only if you are lucky and your device is not offline but don't worry there is also a solution for offline device. So now lets talk if the Device is online and Discoverable you will see the following screen.

When ou click on the Small " i " next to the device name you will see the following screen having 3 options.

if you think that device is just misplaced or someone has taken it without your knowledge the you can use the Play Sound or Send Message option. in this you have type an message and if you have sound option ON then a sound will be played so that you can find where is your lost device And the message will be shown on device screen.

Message can be any content of your choice it could be your address or your contact number where the founder contact or if your ipad is lost you can talk about reward etc. And the message will be shown on screen when it is loked or unlocked

But if your device is lost and you have any fear about your privacy then you can use other options to Lock your device remotely so that no one can steal your information with your device.
And if your device is offline then you can use all above options and Including one more which is Email you when iPad is found. An email will be sent to you when your device will be found.

i would recommend that you enable either Remote Lock or Remote Wipe and as soon as someone tries to take your iPad online, it will become useless to them. (Assuming it was stolen.)
Find My iPad is guaranteed piece of mind that in the event your iPad is lost or stolen you can both locate it (for possible recovery) and lock or wipe it (for security.)
If you have another iOS device, like an iPhone or iPod touch, or secondary iPad, you can even use Find my iPad when you’re mobile. Apples makes an app for that:
Free – Download now
Just download it, login with the same iCloud ID, and you can track any devices on the ID. It provides the same great functionality as the website in a highly convenient, highly mobile app.
If You Enjoyed My Post I Recommened You To Share So That Everyone Can Take Advantage of This App
Subscribe to:
Posts (Atom)